Microwaving corn on the cob is one of those simple pleasures that can instantly elevate your meal without much effort. Whether you’re craving a snack or preparing a side dish for dinner, microwaving corn is quick, easy, and hassle-free. It’s perfect for those days when you’re in a rush but still want to enjoy something fresh and delicious.
No boiling water, no messy grill, just perfectly cooked corn in minutes! Today, I want to share with you how I microwave two ears of corn, along with some personal tips and tricks I’ve picked up over the years. This method will help you enjoy juicy, flavorful corn every time, with minimal cleanup.
My Personal Experience with Microwaving Corn:
Over the years, I’ve come to love microwaving corn so much that I’ve adopted it as my go-to method for preparing corn on the cob. It’s especially great for busy days when I don’t have time to fuss over cooking. I remember once, I was running late to a family dinner, and I quickly microwaved two ears of corn.
I didn’t even have time to make a side dish, but the corn was so good that it became the highlight of the meal. My family was shocked at how tender and flavorful it was, especially considering I didn’t even use a pot! Every time I microwave corn now, I feel a little sense of pride in how simple yet delicious the process is. It’s a no-fuss way to enjoy one of nature’s best snacks, and the results are always satisfying.
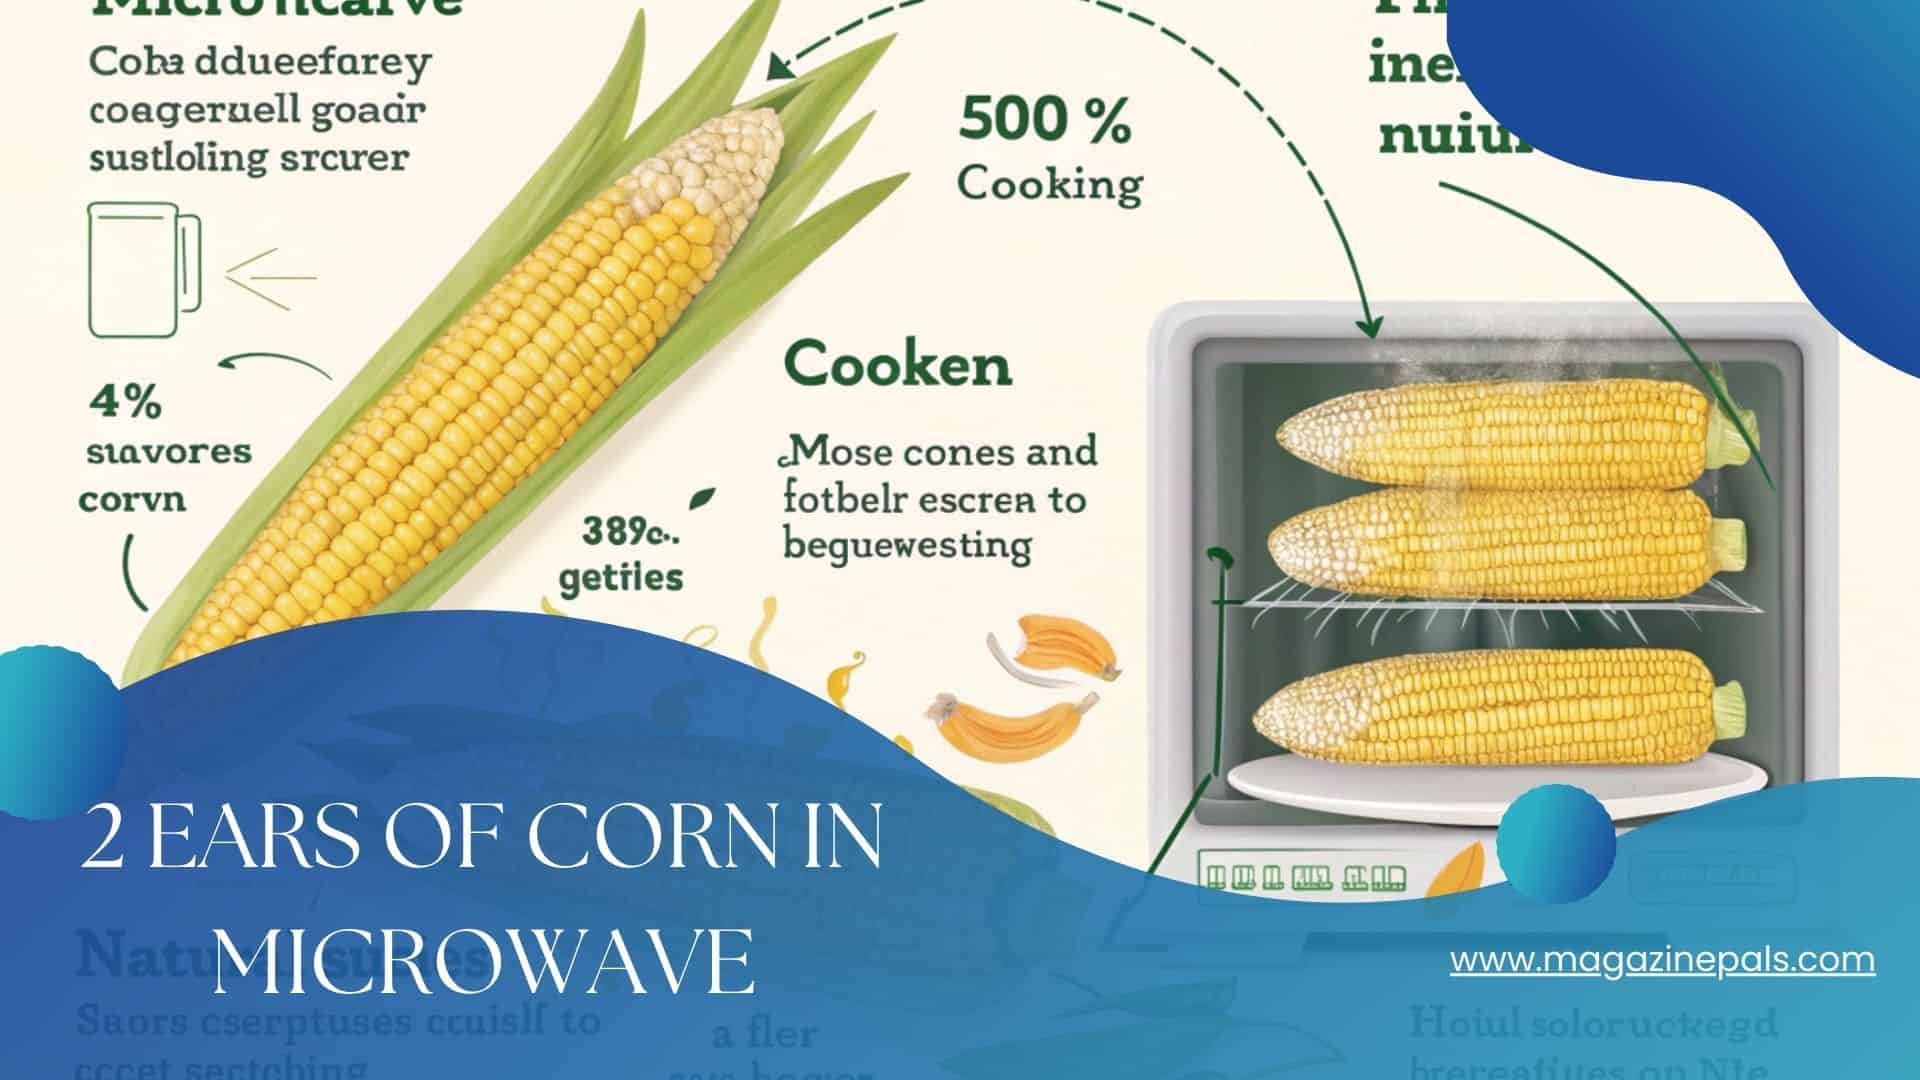
Why Microwave Corn?
Microwaving isn’t just fast—it’s efficient. Unlike boiling or grilling, this method locks in moisture and nutrients. For small batches like 2 ears of corn, the microwave ensures even cooking without heating your kitchen.
Plus, cleanup is a breeze! There’s no need to deal with big pots of water or the mess of grilling. It’s a one-stop cooking solution that delivers the same delicious taste in less time. Whether you’re cooking for yourself or a small group, microwaving corn is the easiest way to enjoy a tasty, fuss-free meal.
Why I Chose to Microwave Corn?
A few years ago, I was on a mission to find the easiest way to prepare corn without having to wait for a pot of water to boil or fire up the grill. Let’s be honest, sometimes we’re in a hurry, or perhaps we’re just too lazy to make things complicated. Microwaving corn turned out to be a game-changer for me. It’s fast, convenient, and I can have hot corn ready in just a few minutes.
I remember the first time I tried microwaving corn. I was skeptical, thinking it wouldn’t taste as good as the grilled or boiled corn I was used to. But to my surprise, the corn came out perfectly – tender, juicy, and bursting with flavor. Since then, microwaving corn has become my go-to method, especially when I’m only making two ears.
What You’ll Need?
- 2 Ears of Fresh Corn on the Cob (or Frozen Corn): Fresh corn is preferred for best flavor, but frozen corn can work if needed. Adjust microwave time based on whether you’re using fresh or frozen corn for optimal results.
- A Microwave-Safe Plate: The plate should be microwave-safe and large enough to comfortably fit both ears of corn. This ensures proper steam distribution for even cooking and prevents any mess or spillage during the microwaving process.
- Damp Paper Towels (If Not Cooking in the Husk): Wrap each ear of corn in damp paper towels if you’re not cooking them in the husk. This method helps retain moisture during cooking, preventing the corn from becoming dry or overcooked.
- A Microwave: Ensure your microwave is working properly. Microwaves vary in wattage, which affects cooking times. If unsure, test the cooking time for the first batch and adjust based on your microwave’s power output.
- Optional: Butter, Salt, Pepper, or Any Seasoning of Your Choice: Once the corn is cooked, add your favorite seasonings. Classic choices like butter, salt, and pepper are always great, but feel free to experiment with different spices or toppings for added flavor.
Step-by-Step Guide to Microwaving 2 Ears of Corn:
Step 1: Prepare the Corn
Now, you have two options here: you can microwave the corn either with the husk still on or shucked (the outer leaves removed). I prefer to microwave my corn with the husk still on, because it helps lock in moisture and steam the corn as it cooks. But, if you don’t have husked corn or you prefer it shucked, that works just fine too!
- With Husk: Rinse the corn under water to remove any dirt or debris. This step ensures that the corn stays clean while cooking and adds moisture for steaming.
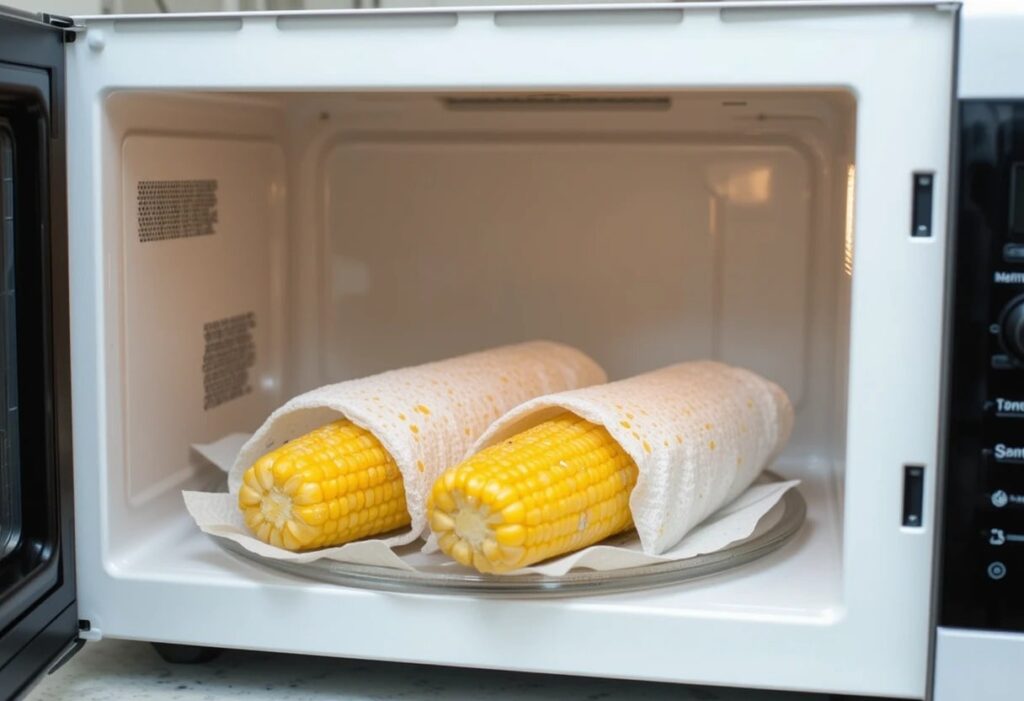
- Without Husk: If you’re removing the husk, wrap each ear of corn tightly in a damp paper towel. This helps retain moisture during the cooking process, ensuring the corn doesn’t dry out.
Step 2: Microwave the Corn
Once your corn is ready, place it on a microwave-safe plate. If you’re microwaving two ears, just lay them side by side. Don’t worry if they seem a bit snug; as long as there’s space for the steam to escape, you’re good to go.
Now, it’s time to cook the corn:
- For Two Ears: Microwave on high for 5½ to 6 minutes. This is the sweet spot for most microwaves, but if you’re unsure, start with 5 minutes and check if the corn is tender. If not, add another minute or so.
- Check Your Microwave’s Wattage: Keep in mind that microwave power varies. If you have a higher-wattage microwave, it may cook faster, while a lower-wattage microwave could require more time. For example, a 1000-watt microwave will likely cook corn faster than one with only 700 watts.
Step 3: Rest the Corn
After the cooking time is up, let the corn rest for 1-2 minutes. This resting period allows the heat to continue to distribute evenly, ensuring that the corn is hot throughout. Also, it helps the corn cool slightly, making it safer to handle.
Step 4: Handle the Corn Safely
If you cooked the corn in the husk, it will be very hot, so use oven mitts or a towel to remove it from the microwave. When the corn has cooled slightly, cut off the stem end (the part where it was attached to the plant), and you should be able to easily slide the husk and silk off.
If you microwaved the corn without the husk, just unwrap the damp paper towel carefully, and you’ll find tender corn ready to enjoy!
Step 5: Season and Serve
Now that the corn is perfectly cooked, it’s time to season it. I always go for a simple combination of butter, salt, and pepper, but feel free to get creative with your toppings. You can add chili powder, grated cheese, lime, or any seasoning you prefer.
Why Microwaving Corn Works So Well?
At first, I didn’t believe that microwaving corn could produce results comparable to boiling or grilling. But what I’ve learned is that microwaving corn is an excellent way to preserve the flavor and texture without compromising quality. Here’s why microwaving works:
- Preserves Moisture: When you cook corn in the husk, the outer layers act like a natural steamer, keeping the corn juicy and tender. If you wrap it in a damp paper towel, it retains moisture in the same way.
- Fast and Convenient: Microwaving saves time. No waiting for water to boil, and no need to watch over a pot on the stove.
- Minimal Cleanup: There’s no pot or grill to clean up afterward. You can simply toss the paper towels or husks in the compost or trash.
Creative Recipes for Leftover Corn:
Corn Salsa:
Turn your leftover corn into a vibrant and flavorful salsa. Simply mix the kernels with diced tomatoes, chopped onions, fresh cilantro, lime juice, and a pinch of salt. It’s fresh, colorful, and adds a bright flavor to any dish. This salsa is perfect with tortilla chips or used as a topping for grilled chicken, tacos, or even a simple salad.
Corn Chowder:
Transform leftover corn into a hearty corn chowder. Blend the corn kernels with vegetable broth, diced potatoes, onions, and a little splash of cream. Simmer until everything is thick and creamy. You can also add crispy bacon bits or shredded cheddar cheese for extra richness. This warm, comforting soup is perfect for colder nights when you want something cozy, filling, and delicious.
Corn Fritters:
Make crispy corn fritters with your leftover corn. Mix the kernels with flour, eggs, baking powder, and a few spices like paprika or pepper. Spoon small portions onto a hot skillet and fry until golden brown. Corn fritters are crunchy on the outside and soft inside, making them a fantastic snack, appetizer, or breakfast item. Serve them hot with sour cream or your favorite dip.
Corn Salad:
Create a refreshing corn salad using your leftover corn. Combine kernels with chopped cucumbers, cherry tomatoes, red onions, and crumbled feta cheese. Drizzle everything with olive oil and fresh lemon juice, and season with salt and pepper. This salad is light, colorful, and packed with flavor. It’s perfect for picnics, potlucks, or a healthy side dish for grilled meats and seafood.
Corn Tacos:
Use your leftover corn to make delicious, easy tacos. Warm some tortillas and fill them with corn, black beans, avocado slices, and shredded lettuce. Top with sour cream or a spicy salsa for added flavor. These corn tacos are colorful, nutritious, and satisfying. They’re a perfect quick meal idea for busy weeknights when you want something tasty without spending too much time in the kitchen.
Creative Recipes for Leftover Corn:
Corn Salsa:
Mix leftover corn kernels with diced tomatoes, onions, fresh cilantro, and a splash of lime juice. This refreshing salsa pairs perfectly with tortilla chips or as a colorful topping for tacos and grilled meats. The sweet corn and tangy lime create a balanced, lively flavor, making it a quick and healthy way to enjoy your leftovers.
Corn Chowder:
Turn leftover corn into a rich, creamy chowder by blending the kernels with vegetable broth, diced potatoes, onions, and a little cream. Simmer everything until it thickens nicely. Add spices like paprika, black pepper, or thyme for extra warmth and flavor. This cozy soup is perfect for chilly nights when you need something hearty, easy, and satisfying.
Corn Fritters:
Make crispy corn fritters by mixing leftover corn with flour, eggs, baking powder, and your favorite spices. Fry small scoops in a pan until golden brown on both sides. They are crunchy on the outside, tender inside, and make a wonderful snack or side dish. Serve hot with sour cream, salsa, or your favorite dipping sauce for extra flavor.
Corn Salad:
Create a light and colorful salad using leftover corn. Toss it with diced cucumbers, cherry tomatoes, red onions, and bell peppers. Dress everything with olive oil, lemon juice, salt, and pepper. This salad is fresh, crunchy, and full of flavor, making it an excellent choice for summer picnics, BBQs, or as a healthy side dish for any meal.
Corn Pancakes:
Give your breakfast a savory twist by adding corn kernels to pancake batter. Cook until golden brown and serve with sour cream, salsa, or a little shredded cheese on top. These corn pancakes are fluffy, slightly sweet, and wonderfully satisfying. They make a unique and hearty breakfast that’s perfect for using up leftover corn in a fun, creative way.
Common Mistakes to Avoid:
While microwaving corn is pretty straightforward, there are a few common mistakes to watch out for:
- Not Wrapping the Corn: If you shuck the corn, make sure to wrap it in a damp paper towel. Otherwise, it can dry out during the microwaving process.
- Overcooking: Microwaving corn for too long can lead to tough, chewy kernels. Always start with 5½ to 6 minutes and check for doneness.
- Skipping the Resting Period: It’s tempting to jump straight into eating, but letting the corn rest for a minute or two helps make sure it’s evenly cooked and easier to handle.
Future Plans for Using Leftover Corn:
In the future, whenever I have leftover corn, I plan to try even more exciting recipes. I’m thinking about making a cheesy corn casserole for family dinners. I also want to experiment with spicy corn dips for parties. It would be fun to create mini corn pizzas too, using a tortilla base and lots of toppings.
I also plan to store leftover corn properly, so it stays fresh for days. Freezing small portions will help me quickly add corn to soups, stews, and salads without wasting anything. My goal is to be more creative and avoid food waste by using every kernel in fun and delicious ways.
Trying international flavors is also on my list! I would love to make Mexican street corn salad (Elote) and maybe even a creamy corn risotto someday. With so many ideas in mind, leftover corn is going to be my secret ingredient for future cooking adventures.
FAQS:
Can I microwave 2 ears of corn without husks?
Yes, you can microwave 2 ears of corn without husks easily. Just wrap each ear with a damp paper towel before microwaving. This keeps the corn moist and prevents it from drying out. Without the husk, the corn still cooks evenly and tastes delicious. It’s a quick and simple method when you want fresh-tasting corn without much effort.
How long should I microwave 2 ears of corn?
Microwaving 2 ears of corn usually takes between 4 to 6 minutes. It’s best to start with 5 minutes and check if the kernels are tender. If needed, add another minute. Always flip the corn halfway through the cooking time for even heating. Microwave wattage can vary, so adjust the time slightly if your corn isn’t fully soft yet.
Should I soak the corn before microwaving?
Soaking corn before microwaving isn’t required ,but can help a lot. If you leave the husk on, soaking creates steam inside, making the corn extra juicy. If you’re removing the husk, simply wrapping the corn in a damp paper towel works perfectly. Either method helps keep the kernels moist, sweet, and tender without getting dry or rubbery after microwaving.
Can I microwave frozen corn on the cob?
Yes, frozen corn on the cob can be microwaved easily. You just need to microwave it for about 7 to 9 minutes, depending on your microwave’s strength. Cover the corn with a damp paper towel to hold in moisture. Frozen corn may release a little extra water, so be careful when handling it after microwaving—it’ll be hot and steamy!
Why does microwaved corn taste sweeter?
Microwaved corn often tastes sweeter because microwaving cooks it very quickly, trapping all the natural sugars inside the kernels. Unlike boiling, where some flavor gets lost in the water, microwaving keeps everything locked in. The result is juicy, tender, and naturally sweet corn that tastes much fresher and brighter than when using traditional boiling or roasting methods.
Conclusion:
Microwaving corn on the cob is a fast, simple, and effective method for preparing a delicious snack or side dish. By preserving moisture and nutrients, it ensures the corn remains juicy and tender, without the need for boiling or grilling.
This convenient approach offers a quick solution for busy days, and with minimal cleanup, it makes enjoying fresh, flavorful corn easy and enjoyable every time. Plus, it saves energy compared to traditional cooking methods, making it an eco-friendly choice. With the option to customize seasoning or add butter, it’s a versatile and satisfying treat.
No responses yet